
Last updated: 11 November 2026
Short answer: To give each faculty useful lab data without exposing everyone else’s, organise machines and users into a Faculty → Department hierarchy, then scope reports and permissions by role. CloudDesk vDash now supports both: department sub-groups for filtering every report and dashboard, and role-based departmental reports where department heads see only their own data and IT admins keep the campus-wide view.
One campus, many audiences
Lab usage data matters to more people than the IT team. Deans want to know whether their labs are being used. Department heads need evidence for software and hardware requests. Lab managers plan opening hours and maintenance. Central IT plans licences and refresh cycles across the whole campus.
The problem is that a single campus-wide report serves none of them well. It is too much detail for a department head, and sending it to everyone means sharing data that is not theirs to see. The usual workaround is for IT to filter and re-send reports by hand, which does not scale.
Step 1: Mirror your organisation in groups
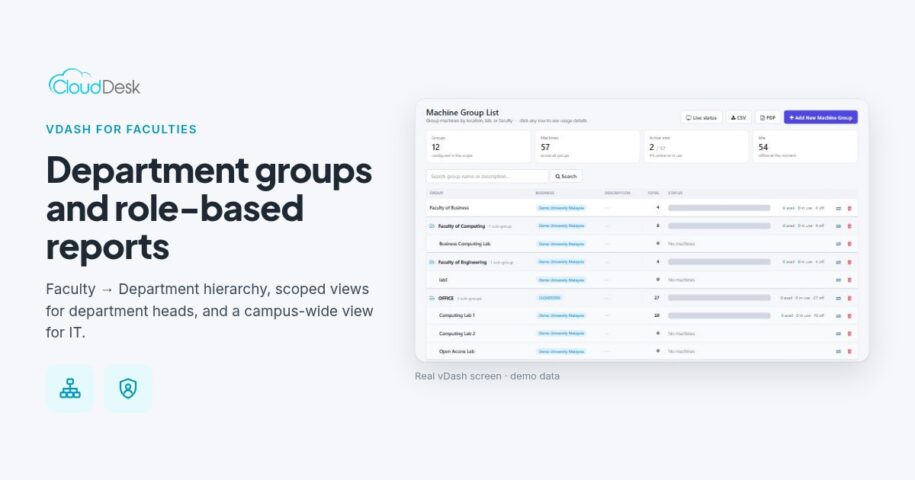
Start by organising machines and users the way your institution is actually structured. In vDash, you can group machines under a Faculty → Department hierarchy, for example a Faculty of Engineering with its individual labs beneath it. The structure supports multi-campus and multi-faculty deployments, so it can follow your organisation rather than forcing you into a flat list.
If you already keep a list of which PCs belong to which lab, vDash’s CSV and Excel import supports a department field, so you can load the mapping in bulk instead of assigning machines one by one.
Step 2: Filter reports and dashboards by department
Once groups are in place, every report and dashboard can be filtered by department. That means the same views IT already uses, such as machine utilisation, application usage and usage by user and department, can be narrowed to a single faculty or lab in a click.
This is useful even before you share anything. IT can quickly compare departments, spot labs that are under-used or over-subscribed, and answer a department’s question with its own numbers.
Step 3: Give each role the right access
Next, decide who sees what. With role-based departmental reports, department heads see only their own machine and app usage data, while the IT admin keeps the full campus-wide view. You can assign department managers with scoped visibility, and role permissions are managed from the central admin panel.
A simple starting model many institutions can adapt:
- Central IT admins: full campus-wide view and permission management
- Faculty or department heads: their own faculty’s or department’s machines and apps
- Department or lab managers: scoped visibility for the labs they run
Keep the roles few and clear at first. It is easier to widen access later than to take it back.
Step 4: Automate the reports
vDash can produce automated PDF and Excel reports scoped by department. Instead of IT exporting, filtering and emailing reports every month, each department receives the view that applies to it. PDF suits a quick read in a management meeting; Excel suits anyone who wants to work with the numbers.
What departments can do with their own data
When department heads can see their own usage, conversations change. A request for more lab PCs or another licence can be backed by real usage rather than impressions. A lab that is rarely used can be repurposed. Software that nobody opens can be dropped at renewal. And IT spends less time producing reports and more time acting on them.
See it on your own campus
Department groups and role-based reports are two of six new features now live in CloudDesk vDash. vDash is offered as a per-PC annual subscription, and you can try it on your own labs with a free 2-week pilot.